In this example, we will using a Brochure Template as an example.
Step 1: Choose your template based on the product you need and
the size you are looking to have printed. This is example is an 11" x
17" Tri-Fold Brochure.
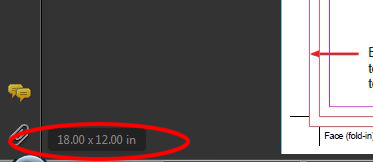
Step 2: If the template format is in PDF, then open the
template in Adobe Acrobat. Check and write down the document size by
placing the cursor in the lower left left hand corner of the screen in
the grey area. In this example, the document is an 11" x 17" Brochure so
the template size is 18" x 12" (as shown in the image below)
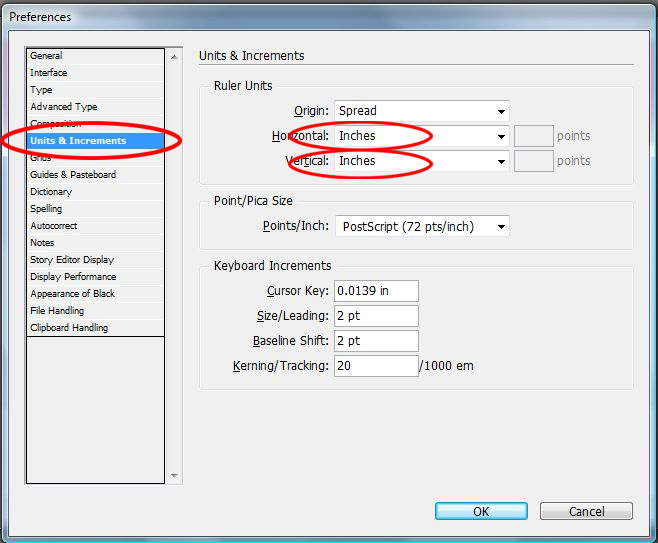
Step 3: Open Adobe InDesign. Press CTRL+K to open the
"Preferences" window. Scroll down to Units and Increments and under
"Ruler Units" change the horizontal and vertial settings to Inches (as
shown in the image below)
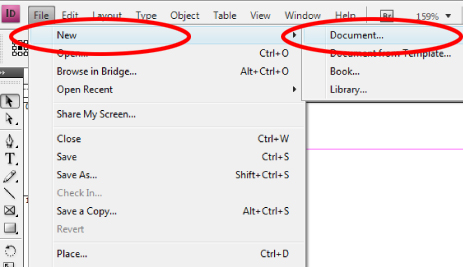
Step 4: Open a new document by clicking FILE > NEW > DOCUMENT (as shown in the image below)
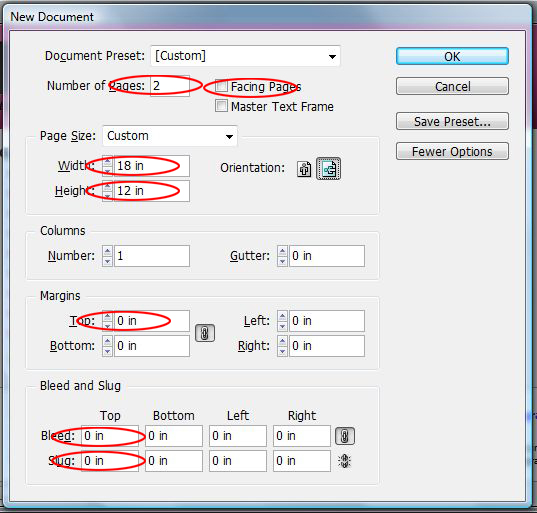
Step 5: In the New Document window (see screenshot below):
-set the number of pages based on the number of pages in the template
PDF. If this is for a 2 sided brochure, then there will be 2 pages. If
this is for a 1 sided Postcard, then the number of pages will be one and
so on.
-De-select "Facing Pages" option
-Set the page size (Height & Width) to the same size that you wrote down from Adobe Acrobat in step 1.
-Make sure that all settings including Gutter, Margins, Bleed & Slug are set to "0".
-Check your screen against this screenshot to make sure everything is correct and then click "ok"
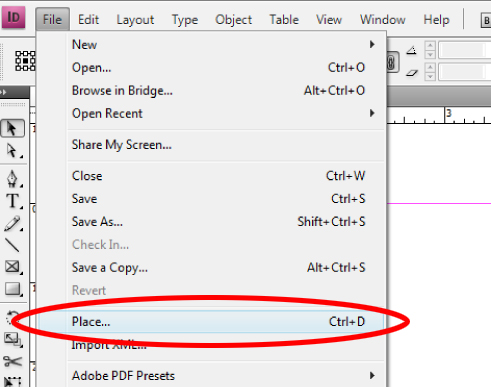
Step 6: Once the new document is created, Click FILE > PLACE (as shown in the image below)
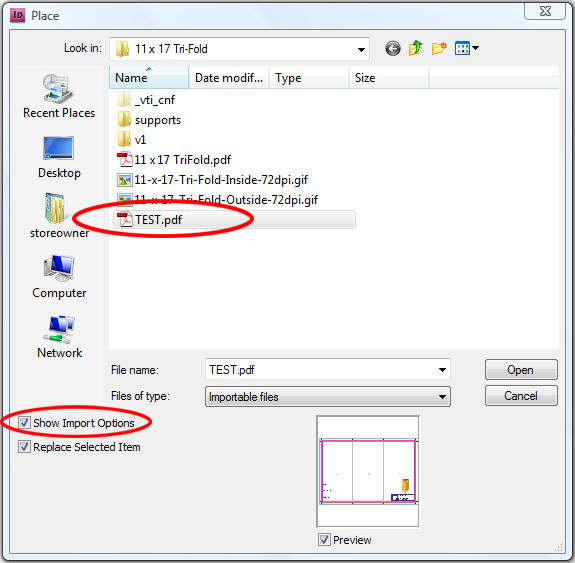
Step 7: Once the "Place" window opens up, make sure the "Show
Import Options" box at the bottom right hand corner is checked and
select your PDF template from PrintPapa ( as shown in the image below).
Click "open".
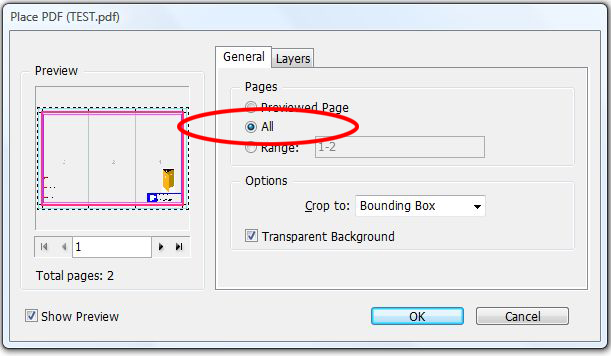
Step 8
: Once you have clicked "open" on the "Place" window the
"Place PDF" window will pop up next. In the "Place PDF" window in the
"General" section under pages, make sure that the "All" option is
selected (as shown in the image below) This is so that you can open both
pages one after the other. Click "ok".
Step 9: Once you have clicked "ok" a small thumbnail of the
PDF template will be following your cursor. Place your cursor in the
upper left hand corner of the first page of your new document and click.
(as shown in the image below)
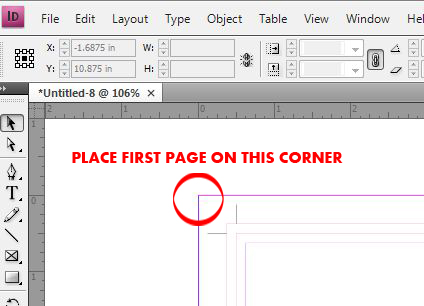
This will place the first page of the PDF on the first page. Scroll
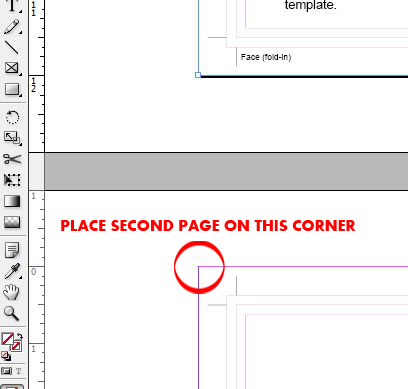
down to the second page of the document and click the upper left hand
corner of that page (as shown in the image below)
Step 10: One you have placed the PDFs and aligned them with
the edges of the Document, you will want to change the image quality. Do
this by clicking ALT+CTRL+H. This should clear the image right up.
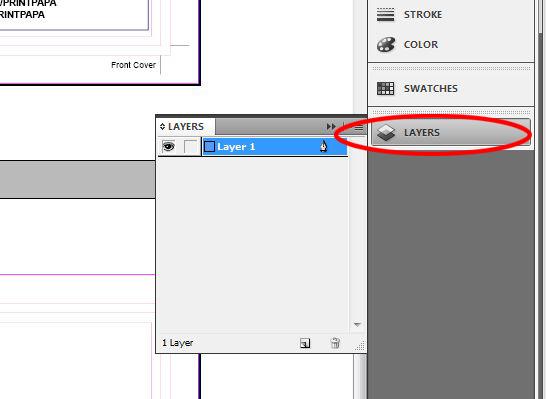
Step 11: Open the "Layers" menu on the far left hand side of the screen (as shown in the image below)
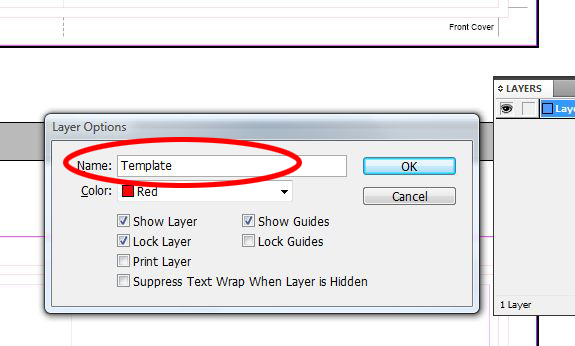
-Double Click "Layer 1" in the "layers" window
-In the Layer Options popup - Name the layer "template". Make sure the
"Lock Layer" option is selected and the "Print Layer" option is not. (as
shown in the image below). Click Ok.
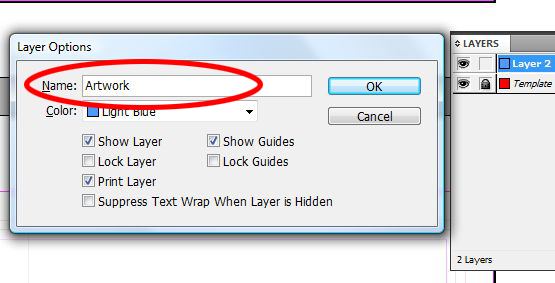
Step 12
: Create a new layer and name it "Artwork" making sure all of the settings are the same as shown in the image below
Step 13: Get creative and start creating your artwork in the "Artwork" layer.
For instructions on creating a Print Ready PDF, Click here.