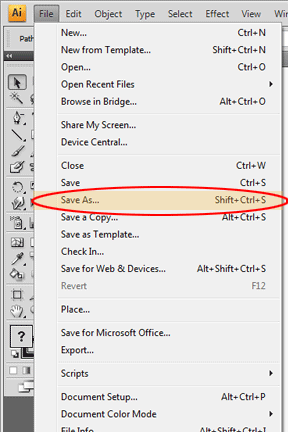
Step 1: Click "File" then scroll down to "save as"
Step 2: Select the Folder you want to save in and click "Save".
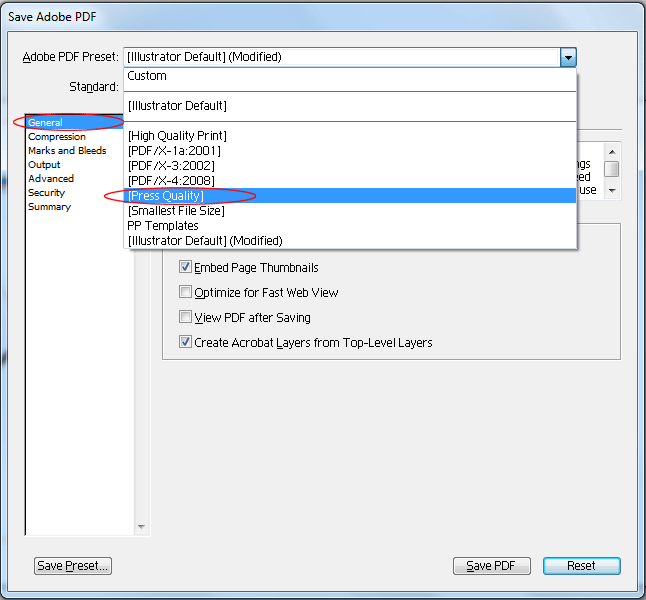
Step 3: In the "Save Adobe PDF" window in the "General" section select the drop down menu marked "Adobe PDF Preset" and scroll down to [Press Quality] as shown below.
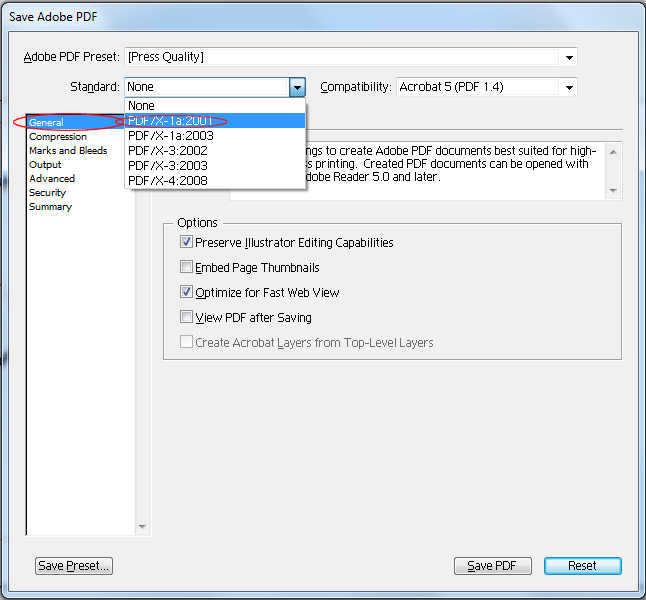
Step 4: In the "Save Adobe PDF" window in the "General" section select the drop down menu marked "Standard" and select the "PDF/X-1a:2001" option as shown below.
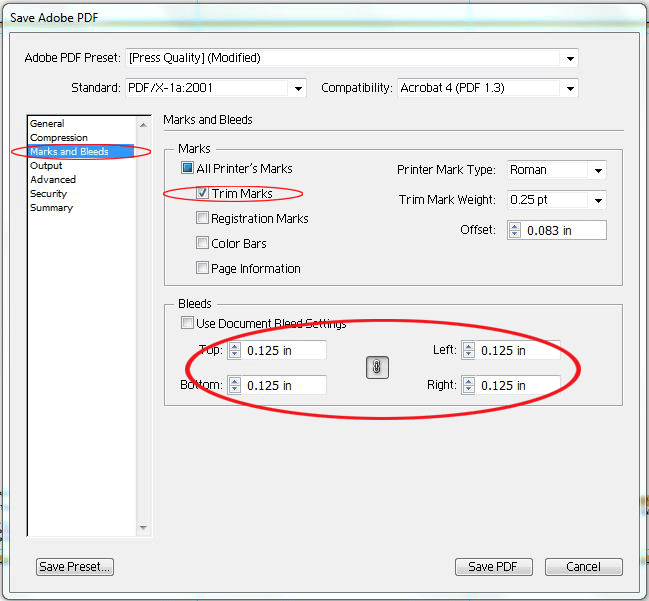
Step 5: In the "Save Adobe PDF" window in the "Marks and
Bleeds" section under "marks" click the box next to "trim marks".
Under "bleeds" Select the link icon in the middle of the 4 text
fields constraining the proportions and set them all to "0.125in" as shown in the image below.
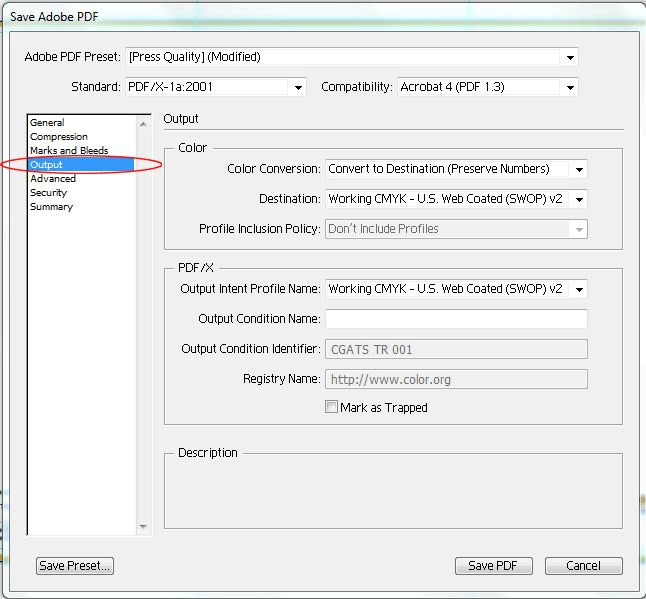
Step 6: In the "Save Adobe PDF" window in the "Output"
section, makes sure the options under "color" and "PDF/X" read the same
as the image below.
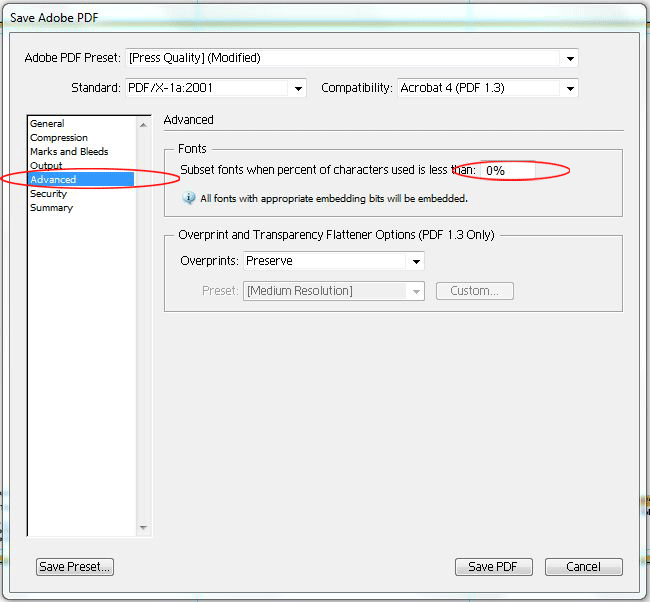
Step 7: In the "Save Adobe PDF" window in the "Advanced"
section, makes sure the text field under "fonts" for "Subset fonts..."
is set to "0%" same as the image below.
Step 8: Once you have completed step 7, click "Save PDF" at the bottom right hand corner of the window.